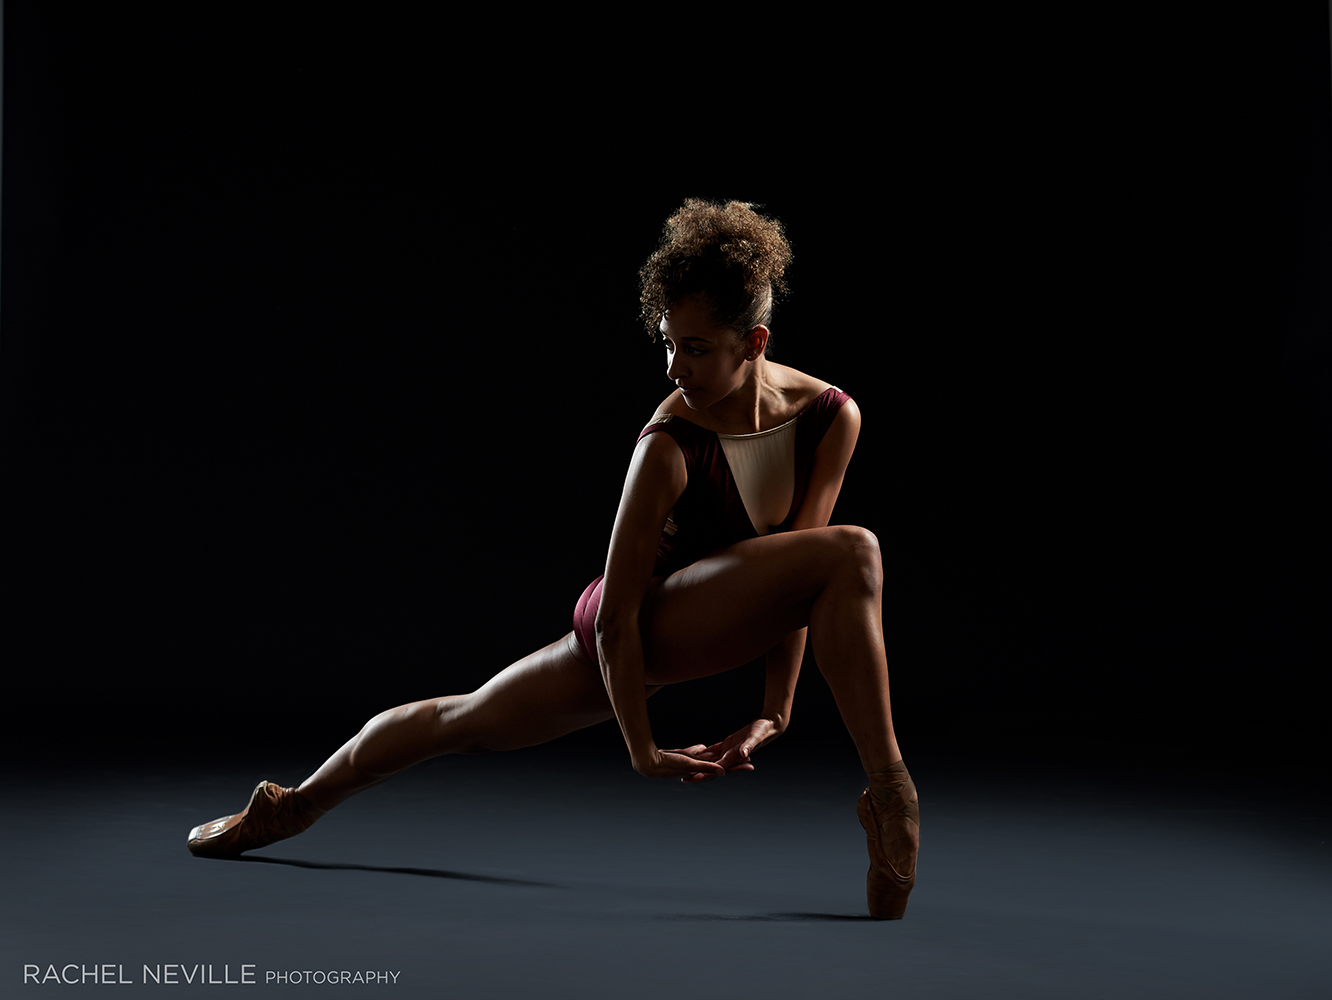
General type of background
Two or three years prior I was eating with an individual picture taker and companion who inquired. “How would you get your pictures to look so perfect?” That was the beginning of what has ended up being such countless inquiries in regards to foundations: how large they are, the place where to get them, stockpiling, taking care of, lighting, after creation.. the rundown continues!
So how about we start toward the start, in view of the sort of foundation, upsides and downsides, the difficulties, and the stunts I’ve concocted for managing them.
There are 4 sorts of foundations I’ve found that is the most well-known:
Muslin foundations
are extremely normal and can be sourced everywhere. Photography stores, on the web, and so forth. You can get them exceptionally printed to pretty much anything you need. Yet they are normally awful to manage as far as kinks (except if you need that look). It is useful to hang them daily or two preceding a shoot and have understudy steam out. To pull them tight (wiping out foundation undulating), I utilize A braces to pull the material rigid with stands or auto-shafts. Be careful, this material is modest and regularly doesn’t pull straight easily (While paying $100 for a foundation is alluring, you get what you pay for.). Muslin foundations are, nonetheless, simple to store! They overlap up pleasantly, making them simple to sack or to keep on a rack.
Material foundations
Are, in a word, great! Obviously these frequently uniquely designed wonders include some significant pitfalls both in cash and sheer weight. My material foundations were made by Oliphant a family-run organization in Brooklyn that has been delivering custom work for a really long time for huge names in the photography business. These foundations keep going a truly prolonged stretch of time on the off chance that you deal with them and “patina” flawlessly. They are extremely weighty by correlation with muslin or paper, so you’ll require generous stands or emotionally supportive networks. They are best firmly rolled and stood upward when not being used. Mine is 12 ft wide, and I have them reversible for various floor choices (We put one down for a story and go up with one on the stands.), yet you can get them in basically any shape and size you need.
Paper foundations
come in 4 ft, 9 ft and 12 ft widths, albeit just whites, dark, dark and chroma colors come in the 12 ft size. Papers are great since they are very modest ($60 – $120/roll contingent upon size) and are not difficult to keep clean. just remove the filthy floor region and carry out additional! Savage is the organization I like the best for its shading sense of taste just as simplicity of kicking the roll-off. I have a lot of photographic artists who ask me how huge my papers are. This is simply because when we utilize 9 ft’s we regularly need to broaden the foundation sides in after creation. Papers should be rolled firmly and put away upward, if you keep them on a bar evenly you risk the heaviness of the roll moving towards level on the drawback. You’ll get level waves when you carry it out.
Some business picture takers who don’t re-utilize their papers cut little 2 inch cuts down the sides of the paper where it lays on the ground. The thought behind this is to not have the paper swell on the floor. I’ve had accomplishments with this on and off. Contingent upon how much moistness is noticeable all around and how old the paper roll is, you can here and there dispose of or reduce that wave through that. Tragically, artists move which implies that as a general rule we need to tape the sides of our paper down to keep away from trips. Talking about which, simply a note, our inclination in my studio for tape (we are tape upstarts really), is 2-inch blue painter’s tape. Gaff tape is excessively costly for this reason, and duck tape approach to tacky.
How to get ride of waves and knocks on the up-clear of a paper you inquire?
A couple of things to attempt:
1) control your lights so they don’t spill onto the foundation.
2) Actually light your experience independently. By having light coordinated straight onto the foundation, you are filling in the shadows of the waves.
3) Make sure that you have some distance between your artist and the foundation. That will reduce the waves through the profundity of the field.
4) When you’re not ready to do it in-camera, the favored way, we move to after creation! This is a thoroughly isolated blog entry, yet indeed, we do regularly adjust our experiences in posts.
Cycloramas,
Otherwise called cyc’s or bays, are great if you approach a business studio or shared space. I incorporated into my studio a 22ft wide cyc with a sprung floor for the artists.
Speedy side notes:
each other cyc I’ve found over the most recent 20 years is a concrete floor, be cautious when artists are needing to bounce. There is next to no upkeep to a cyc in case it’s done appropriately initially aside from washing and painting. We paint with a scentless introduction for the speed of drying. Ensure you utilize a similar paint without fail, or you will run into issues with streaking.
There are not very many individuals that form cyc’s, however, there are two organizations that make pre-fab divider bends that you can have done and afterward utilize a worker for hire to assist work with an excursion into your divider and floor. Be careful with creases – the breaks between sheets of compressed wood should be very much contained so they don’t begin to surface over the long haul (This expects you to get a modern sander to restore.).
Obviously, these are the most widely recognized foundations I’ve actually experienced as a photographic artist however, as a rule, knowing what’s out there and what reason they serve, particularly when shooting artists, will assist with raising your range of abilities. Furthermore, as usual, connect with any inquiries you may have!
Related posts
MUSIC AUDITION PREPARATION
Getting ready FOR A MUSIC AUDITION Congratulations! If you have decided to try a few and verify this …

How to find a job as a session musician
FIND WORK AS A SESSION MUSICIAN The hardest part of getting started. A group entertainer is finding y …